Introduction
Engine oil is often called the lifeblood of your vehicle, and for good reason. It lubricates moving parts, reduces friction, cools the engine, and helps clean contaminants. Regular oil changes are one of the most important maintenance tasks you can perform to extend your engine's life and maintain optimal performance. Understanding how to check and change your oil is essential knowledge for every car owner.
Many car owners rely solely on quick-lube stations or dealerships for oil changes, paying premium prices for a service you can easily perform yourself. Changing your own oil not only saves money but also gives you confidence that the job was done correctly with quality materials. This guide will walk you through the entire process, from checking your oil to completing a successful oil change.
Whether you're a first-time DIYer or looking to refine your technique, this comprehensive guide provides everything you need to know. We'll cover the tools and materials required, step-by-step instructions for both checking and changing oil, and essential tips for maintaining your engine's health. By following this guide, you'll save money and gain the satisfaction of maintaining your own vehicle.
Tools / Materials Needed: Oil Change Essentials
Basic Tools
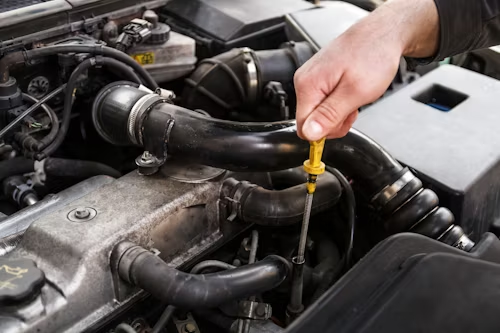
You'll need a few basic tools to complete an oil change successfully. An oil filter wrench is essential for removing the old filter. A socket set or wrench is needed to remove the oil drain plug—typically 14mm or 15mm for most vehicles. A drain pan catches the old oil for proper disposal. A funnel prevents spills when adding new oil. A rag or paper towels are useful for cleaning spills.
Lifting Equipment
Unless your vehicle has sufficient ground clearance, you'll need to lift it to access the oil drain plug. A hydraulic jack and jack stands are essential for safety. Never work under a vehicle supported only by a jack. Wheel chocks prevent the vehicle from rolling. Ramps are an alternative to jack stands if your vehicle has adequate clearance. Safety should always be your top priority.
Oil and Filter
Purchase the correct type and amount of oil for your vehicle. Consult your owner's manual or the oil cap for specifications. Buy a quality oil filter—OEM filters are recommended but quality aftermarket filters work well. Consider buying oil in bulk if you change frequently. Always have slightly more oil than you think you'll need to account for what remains in the engine.
Safety Equipment
Safety is paramount when working with vehicles. Safety glasses protect your eyes from oil splashes. Gloves protect your hands from hot components and chemicals. Old clothes or coveralls prevent oil stains on your good clothing. A fire extinguisher should be readily available. Never compromise on safety equipment.
Disposal Supplies
Proper oil disposal is essential for environmental protection. Most auto parts stores accept used oil for recycling. Use a sealed container to transport old oil to the recycling center. Never pour oil down drains or on the ground. Responsible disposal protects the environment and is often required by law.
Step-by-Step Instructions: Checking Your Oil
Step 1: Park on Level Ground
Ensure your vehicle is parked on level ground for an accurate oil reading. If the vehicle is on an incline, the oil will pool to one side, giving a false reading. Engage the parking brake and turn off the engine. Allow the engine to cool for at least 5-10 minutes for hot oil to settle back into the pan. Proper positioning ensures accurate oil level measurement.
Step 2: Locate the Dipstick
Find the oil dipstick, typically a brightly colored handle labeled "engine oil" near the front of the engine compartment. Pull the dipstick out completely and wipe it clean with a rag or paper towel. This removes any oil that may have splashed up the tube, which would give an inaccurate reading.
Step 3: Check Oil Level
Reinsert the dipstick fully, then pull it out again. Observe the oil level on the dipstick markings. Most dipsticks have "add" and "full" marks, or crosshatched areas indicating the safe range. The oil level should be between these marks. If it's below the add mark, you need to add oil. If it's above the full mark, you may have overfilled.
Step 4: Inspect Oil Condition
While checking the level, also inspect the oil's condition. Rub a small amount between your thumb and forefinger. Healthy oil should be amber or brown and smooth. If it's black and gritty, it's overdue for a change. If it's milky, coolant may be leaking into the oil—this indicates a serious problem requiring immediate attention. Metal particles indicate internal engine wear.
Step 5: Add Oil if Needed
If the oil level is low, add the correct type of oil through the oil fill cap. Add small amounts at a time, checking the dipstick frequently to avoid overfilling. Overfilling can cause foaming and reduced lubrication. Add oil until the level reaches the appropriate mark on the dipstick. Replace the oil fill cap securely.
Step-by-Step Instructions: Changing Your Oil
Step 1: Prepare the Vehicle
Start the engine and let it run for a few minutes to warm the oil slightly. Warm oil drains more completely and carries more contaminants with it. Don't let the engine get hot—warm to the touch is sufficient. Turn off the engine and engage the parking brake. If your vehicle has low ground clearance, lift it using jack stands following all safety procedures.
Step 2: Position the Drain Pan
Place your drain pan under the oil drain plug. The plug is typically at the bottom of the oil pan. Position the pan so it will catch all the oil as it drains. Ensure the pan is large enough to hold all the oil plus some extra room for splashing. Proper positioning prevents messy spills.
Step 3: Remove the Drain Plug
Using the appropriate socket or wrench, loosen the drain plug. Be prepared for oil to start flowing immediately. Remove the plug completely and set it aside. Allow the oil to drain completely—this may take 10-20 minutes depending on temperature. While waiting, you can remove the oil filter.
Step 4: Remove the Old Oil Filter
Locate the oil filter, typically on the side or top of the engine. Position your drain pan under the filter as some oil will drain when it's removed. Use your oil filter wrench to loosen the filter. Continue unscrewing by hand once it's loose. Be prepared for oil to spill as the filter comes off. Remove the filter completely and set aside.
Step 5: Prepare the New Filter
Take your new oil filter and apply a thin film of clean oil to the rubber gasket. This helps the filter seal properly and makes it easier to remove next time. Don't overfill the filter with oil—just a light film is sufficient. This simple step ensures proper sealing and easier future removal.
Step 6: Install the New Filter
Clean the filter mounting surface on the engine with a rag. Screw the new filter onto the engine by hand until the gasket contacts the mounting surface. Tighten an additional three-quarters turn by hand—don't over- tighten as this can damage the filter or make it difficult to remove. Proper installation prevents leaks and ensures good filtration.
Step 7: Reinstall the Drain Plug
Once all oil has drained, clean the drain plug and the surrounding area. Inspect the plug's washer and replace if damaged. Apply a small amount of thread sealant if recommended by your manufacturer. Reinstall the plug and tighten to the manufacturer's torque specification. Overtightening can strip the threads, while undertightening can cause leaks.
Step 8: Add New Oil
Remove the oil fill cap and insert your funnel. Pour in the correct amount of new oil as specified in your owner's manual. Most engines take 4-6 quarts, but check your specific vehicle. Add oil gradually, checking the dipstick periodically to avoid overfilling. Stop when the oil reaches the appropriate level on the dipstick.
Step 9: Check for Leaks
Start the engine and let it idle for a few minutes. Check around the drain plug and oil filter for any signs of leaking. If you see leaks, turn off the engine immediately and tighten the leaking component. Once you're confident there are no leaks, lower the vehicle if you raised it. Check the oil level again after the engine has run and add if necessary.
Step 10: Dispose of Old Oil Properly
Pour the old oil from your drain pan into a sealed container for transport. Most auto parts stores and some service stations accept used oil for recycling. Never pour oil down drains, on the ground, or in the trash. Responsible disposal protects the environment and is often required by law. Keep records of your oil changes for future reference.
Maintenance Tips: Essential Oil Care Advice
Follow Manufacturer Recommendations
Always use the oil type and viscosity recommended by your vehicle's manufacturer. This information is found in your owner's manual or on the oil fill cap. Using the wrong oil can reduce engine protection and fuel economy. Modern engines are designed for specific oil formulations—using the correct oil ensures optimal protection and performance.
Change Oil Regularly
Follow the recommended oil change interval for your vehicle. This is typically every 3,000-7,500 miles depending on oil type and driving conditions. Severe driving conditions like short trips, extreme temperatures, or towing require more frequent changes. Don't extend intervals beyond recommendations to save money—this costs more in the long run through engine wear.
Check Oil Level Monthly
Make it a habit to check your oil level at least once a month. Many modern engines consume small amounts of oil between changes. Catching low oil early prevents engine damage. Check more frequently if you notice the oil level dropping or if your vehicle has high mileage. Regular checks catch problems before they become serious.
Use Quality Oil and Filters
Invest in quality oil and filters for your vehicle. While synthetic oils cost more, they offer better protection and can extend change intervals. OEM or premium aftermarket filters provide better filtration than cheap alternatives. Quality materials may cost more initially but save money through better engine protection and longer intervals.
Watch for Oil Leaks
Regularly inspect under your vehicle for signs of oil leaks. Look for fresh oil spots on your driveway or parking area. Check around the oil drain plug, oil filter, and valve cover gaskets. Small leaks can become big problems if ignored. Address leaks promptly to prevent oil loss and potential engine damage.
Monitor Oil Consumption
Some oil consumption between changes is normal, but excessive consumption indicates problems. If you find yourself adding oil frequently between changes, investigate the cause. This could be leaks, worn piston rings, or valve guide issues. Excessive consumption is a warning sign that shouldn't be ignored.
Keep Records
Maintain detailed records of all oil changes. Include the date, mileage, oil type used, and filter brand. Records help you track intervals and provide documentation if you sell the vehicle. Many buyers value well- documented maintenance history. Good records are an investment in your vehicle's value.
Consider Your Driving Conditions
Adjust your oil change interval based on your driving conditions. Severe conditions include short trips, extreme temperatures, dusty environments, or frequent towing. These conditions require more frequent changes. If you drive primarily in severe conditions, consider changing oil more often than the standard recommendation.
Real-World Examples
For example, a typical 2.0L four-cylinder engine produces around 150-200 horsepower.
Consider the Toyota Prius, which uses a hybrid system to achieve over 50 MPG.
The Ford F-150's 3.5L EcoBoost V6 engine produces 400 horsepower while maintaining good fuel efficiency.
Data and Statistics
According to SAE International, approximately 90% of modern engines are related to advanced materials and manufacturing techniques.
Source: SAE International
According to EPA, approximately 25% of fuel efficiency improvements are related to hybrid technology.
Source: EPA
Practical Checklist
- Check the engine oil level and condition
- Inspect the air filter for dirt and debris
- Verify coolant level and quality
- Check all belts and hoses for wear
- Inspect spark plugs for wear or damage
Frequently Asked Questions
Q: What is the most common cause of engine failure?
A: The most common cause of engine failure is lack of proper maintenance, particularly not changing the oil regularly. Dirty oil can cause excessive wear on engine components, leading to premature failure.
Q: How often should I change my engine oil?
A: Most manufacturers recommend changing your oil every 5,000 to 7,500 miles for conventional oil, or every 10,000 to 15,000 miles for synthetic oil. Always check your owner's manual for specific recommendations.
Visual Learning Resources
While this article provides comprehensive text explanations, visual aids can enhance understanding. Consider the following resources for additional learning:
- Diagrams: Look for technical diagrams showing component relationships and system interactions
- Infographics: Visual representations of data and statistics help grasp complex information quickly
- Video Tutorials: Step-by-step video demonstrations provide practical guidance
- Interactive Simulations: Online tools allow you to experiment with concepts safely
These resources complement the written content and cater to different learning styles. Visual learners particularly benefit from diagrams and infographics, while hands-on learners may prefer video tutorials and simulations.
Expert Tips and Best Practices
💡 Pro Tip #1: Prevention is Better Than Cure
Regular maintenance and proactive checks prevent most major issues. Establish a routine inspection schedule and stick to it. Small problems caught early are much easier and less expensive to fix than major failures.
💡 Pro Tip #2: Quality Matters
When replacing parts or fluids, always use quality products that meet or exceed manufacturer specifications. Inferior products may save money initially but often lead to premature failure and additional costs down the road.
💡 Pro Tip #3: Documentation is Your Friend
Keep detailed records of all maintenance, repairs, and modifications. This documentation helps track service intervals, identify recurring issues, and increases resale value. Digital photos of work performed can be particularly valuable.
Conclusion
Regular oil changes are one of the most important maintenance tasks you can perform for your vehicle. By following the guidelines in this comprehensive guide, you'll maintain your engine's health, improve performance, and extend its life. The satisfaction of performing your own oil changes is significant, and the skills you develop will serve you throughout your life as a car owner.
Remember that oil is your engine's lifeblood—treat it with the care it deserves. Check your oil regularly, change it at appropriate intervals, and always use quality materials. These practices will keep your engine running smoothly for years to come and save you money on costly repairs.
Whether you're a first-time DIYer or experienced mechanic, proper oil maintenance is essential knowledge for every car owner. Take pride in maintaining your vehicle's oil correctly—it's an investment that pays dividends in engine longevity, performance, and reliability.